Powerful and elegant tools for visualizing a spline, moving objects along a complex path, controlling particles systems and more!
Call them splines, paths or curves but regardless of their name they are a beautiful use of math for adding soul and expression to movement and more in your projects. From expressively moving a camera through a battlefiled, to creating an on-rails shooter, to visualizing paths and wires to gaining total control on how a particle system emits and flows the spline solution in Surge is extremly powerful and offers simplistic editing controls that were engineered to feel like they were part of Unity from day one.
Setting things up
To start a spline simply add the Spline component to a GameObject in your scene. The spline system in Surge was crafted to be extremly easy to work with. To edit the curve simply grab a node and move it around. It feels just like anything that came out of the box from Unity - no custom controls and no crazy tools to fiddle with.

Adjusting length
There are two ways to adjust the number of anchors (length) of a spline:
- The "Extend" button.
- Good old copy/paste of an anchor.
Looping
Looping a spline takes a simple setting of the "Loop" flag. To help your know where a spline begins look for the node with multiple rings - this is 0 or the start of the path.
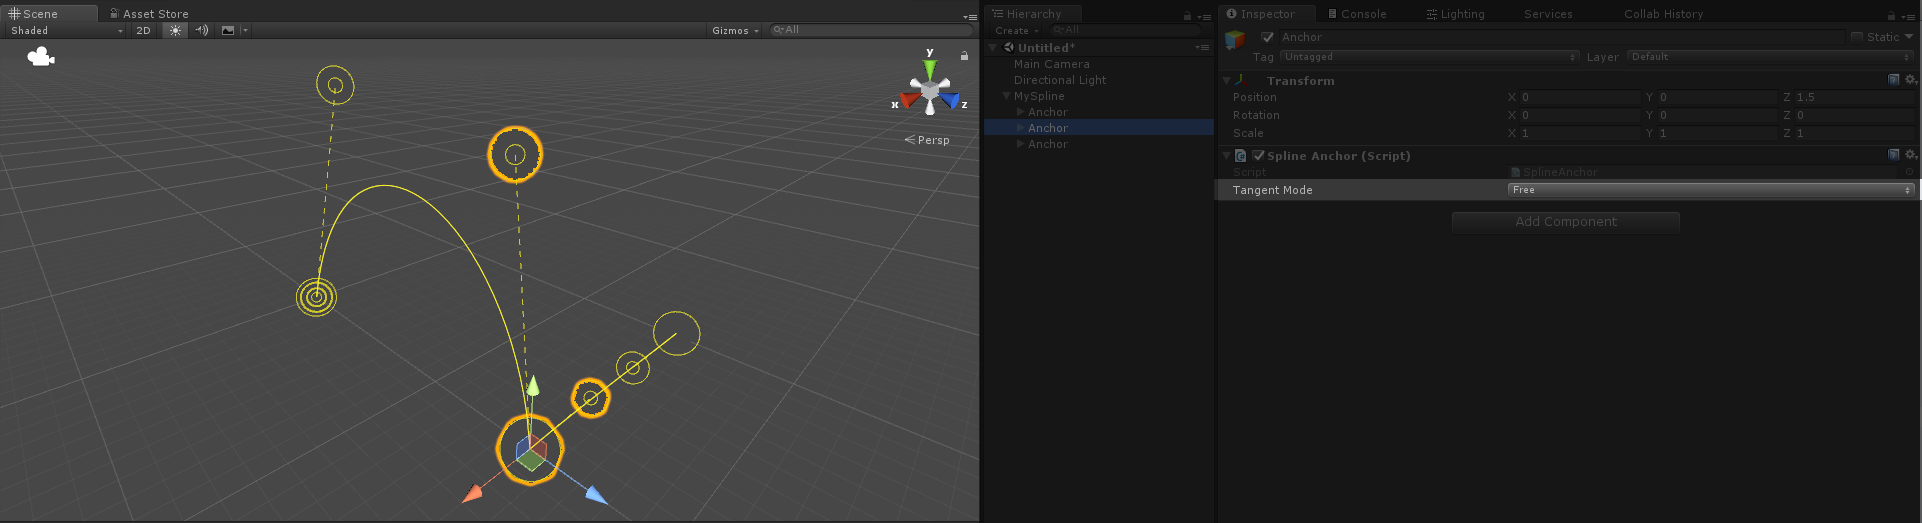
Precision control
Clicking on an anchor within a spline will allow you to tweak how the spline flows in and out of that anchor to gain total control for allowing hard edges and mirrored anchor points.
Splines for position and motion
Surge's splines offer a few ways to place and move things along them with and without using code.
To simply place things along a spline with no coding you can use the "followers" array to snap and place an object. Also note that you can even access this array through code to move things with total control.
You can even use Surge's Tween system to animate along a spline with one line of code.
using UnityEngine;
using Pixelplacement;

public class SplineTweener : MonoBehaviour
{
	public Spline mySpline;
	public Transform myObject;

	void Awake ()
	{
		Tween.Spline (mySpline, myObject, 0, 1, true, 2, 0, Tween.EaseInOut, Tween.LoopType.PingPong);
	}
}
Visualizing a spline
By default a spline does not render in-game. However, adding a SplineRenderer component will cause a spline to feed its data into Unity's LineRenderer to make itself visible for creating stylish weapon trails, dynamic wires and all kinds of crazy stuff.
Wrangling a particle system
By adding a SplineControlledParticleSystem component to a spline you can even force a particle system to travel along a spline for total control of your effects.

Do even more with code
To place objects along a spline through code simply make a call to GetPosition to receive a world coordinate.
Splines offer a full suite of tools that can be accessed through code for placing things, offsetting things, finding the nearest point along a spline and more. Explore the Interface section at the top of this page for more information.
using UnityEngine;
using Pixelplacement;

public class SplineUser : MonoBehaviour
{
	public Transform target;
	public Spline spline;
	[Range (0,1)] public float percentage;

	void Update ()
	{
		target.position = spline.GetPosition (percentage);
	}
}
Spline.cs
Spline.cs is the main component and interface for controlling and utilizing a spline.
Up
Get the up vector at a percentage along the spline.
Right
Get the right vector at a percentage along the spline.
Forward
Get the forward vector at a percentage along the spline - this is simply a wrapper for the direction since they are the same thing.
GetDirection
Returns a facing vector at the given percentage along the spline to allow content to properly orient along the spline.
GetPosition
Returns a position on the spline at the given percentage with an overload for providing an offset as well. The "evenDistribution" and "distributionSteps" enable consistant and even distribution along a spline which is more expensive but produces far more consistant results.
ClosestPoint
Given a world point and a number of divisions (think granularity or precision) this returns the closest point on the spline.
AddAnchors
Makes a spline longer.
GetCurve
Gets the current curve at the percentage.