Local area networking made easy.
Sometimes you don't need a sledgehammer to attach a Post-it to a coworker's door and sometimes you don't need a massive (and complex) networking solution to just send data to something else. Communication should be simple and Surge's Communication aims to do just that. Despite it's simple approach, Communication is capable of handling numerous networking situations and is extremly flexible and even powerful enough to support a custom video streaming solution.
Communication consists of just 2 parts: a client (with support for as many clients as your setup needs) and a server. These two parts can be built from different scenes (a server scene and a client scene) in a project or even completely separate builds and even separate platforms (mobile to desktop for example). Once the applications are running on the same network or WiFi the server will broadcast its information to all available clients. Each client will throw a simple event when it hears from a server and your application can simply connect and start sending information.
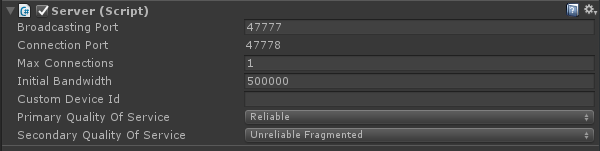
The Server
Once running in your scene, the server has a heartbeat it sends out letting all clients on the network know it exists. Both the server and client must have the same Broadcasting Port and Quality of Service(s) - all other "tweaks" to the server are optional. If you don't provide a Custom Device Id the system will automatically generate a random and unique 5 digit id that will persist for the device in use. The main reason for setting up a Custom Device Id is for easier identification if a few servers are running on your network. For information on the Quality of Service and how it impacts your communications please see the Unity documentation on the topic.
The Client
Once running in your scene, the client eagerly waits for available server heartbeats. You have complete flexibility on what server you want to connect to by simply looking at it's deviceID. This allows you to offer a menu of available servers to a user (if multiple are running on your network) or you can simply opt to connect to the first server that you see if you are working on a closed system for say remote presentation control. Both the client and server must have the same Broadcasting Port and Quality of Service(s). For information on the Quality of Service and how it impacts your communications please see the Unity documentation on the topic.
To make things even easier to get up and running you can add the optional ClientConnector to your client which automatically creates a menu of available servers and also adds the option to automatically connect to the first server that says "hello". Communication is perfect for remote presentation systems, simple games, and more and sometimes you know you will only have 1 server and 1 client which is a perfect situation for automatic connection so you can focus on other things.

Example: Tell a client to change its background color.
Project setup:
- Make a new project and make sure Edit > Project Settings > Player > Resolution and Presentation > Run In Background is checked.
Server setup:
- Create a scene and save it as "Server".
- Drop the Server component on something in this scene.
- Create a script called "ServerDemo" that sends over a random color to all connected clients when the space bar is pressed with the following code and drop it on your Server:
using UnityEngine;
using Pixelplacement;

public class ServerDemo : MonoBehaviour
{
	private void Update()
	{
		if (Input.GetKeyDown(KeyCode.Space))
		{
			Color randomColor = new Color(Random.value, Random.value, Random.value);
			Server.Send(randomColor);
		}
	}
}
Client setup:
- Create a scene and save it as "Client".
- Change the Main Camera's Clear Flags to Solid Color.
- Drop the Client component on something in this scene.
- Drop the ClientConnector component on your Client in this scene and tick "Connect To First Available".
- Create a script called "ClientDemo" that changes the background color of your camera and drop it on your Client:
using UnityEngine;
using Pixelplacement;

public class ClientDemo : MonoBehaviour
{
	private void Awake()
	{
		Client.OnColor += HandleColor;
	}

	private void HandleColor(ColorMessage message)
	{
		Camera.main.backgroundColor = message.value;
	}
}
Seeing it work:
- Perform a build and run of the client scene. If you deployed to a phone then make sure this device is on the same network as the computer running the Unity editor.
- Open the server scene and press play in Unity.
- Click on the Game View in Unity and tap like a crazy person on the space bar and watch the client change it's background color.
Message flexibility
Communication can send a bunch of different messages ranging from a single type to an array of types such as a single color or an array of colors. In addition, each message you can send includes an optional id value. This value is perfect for categorizing a message, parsing for a specific client, or even additional data to be sent along. Flexibility and creative thinking are key here.
For example let's give some context to some float messages so we can send over a volume, and a slide number to jump to for a remote presentation system. First let's get some controls together for using the keyboard to send volume and slide changes from the server.
using UnityEngine;
using Pixelplacement;

public class ServerDemo : MonoBehaviour
{
	float volume;
	float slide;

	private void Update()
	{
		if (Input.GetKeyDown(KeyCode.UpArrow))
		{
			volume++;
			Server.Send(volume, "volume");
		}

		if (Input.GetKeyDown(KeyCode.DownArrow))
		{
			volume--;
			Server.Send(volume, "volume");
		}

		if (Input.GetKeyDown(KeyCode.LeftArrow))
		{
			slide--;
			Server.Send(slide, "slide");
		}

		if (Input.GetKeyDown(KeyCode.RightArrow))
		{
			slide++;
			Server.Send(slide, "slide");
		}
	}
}
Now let's reuse a handler on the client side that evaluates our message's id and performs the appropriate action.
using UnityEngine;
using Pixelplacement;

public class ClientDemo : MonoBehaviour
{
	public AudioSource sound;

	private void Awake()
	{
		Client.OnFloat += HandleFloat;
	}

	private void HandleFloat(FloatMessage message)
	{
		switch (message.id)
		{
			case "volume":
				Debug.Log("Volume set to: " + message.value);
				sound.volume = message.value;
				break;

			case "slide":
				Debug.Log("Slide changed to: " + message.value);
				ChangeSlide(message.value);
				break;
		}
	}

	private void ChangeSlide(float slide)
	{
		//application code to change a slide...
	}
}
We can even target a specific client by simply evaluating a message's id and comparing it to a GameObject's name or a specific identifier we've set up. This is useful for sending a message from one client to another by first sending a message to the server and then having the server send a message to all the clients by passing this custom id.
using UnityEngine;
using Pixelplacement;

public class ClientDemo : MonoBehaviour
{
	private void Awake()
	{
		Client.OnVector3 += HandleVector3;
	}

	private void HandleVector3(Vector3Message message)
	{
		//is this message meant for me?
		if (message.id == name)
		{
			transform.position = message.value;
		}
	}
}
Server.cs
Events
Events that can be bound to through code.
To "bind" to an event through code use "+=" and to "unbind" use "-=".
using UnityEngine;
using Pixelplacement;

public class ServerDemo : MonoBehaviour
{
	private void OnEnable()
	{
		Server.OnPlayerConnected += HandlePlayerConnected;
		Server.OnPlayerDisconnected += HandlePlayerDisconnected;
		Server.OnString += HandleString;
	}

	private void OnDisable()
	{
		Server.OnPlayerConnected -= HandlePlayerConnected;
		Server.OnPlayerDisconnected -= HandlePlayerDisconnected;
		Server.OnString -= HandleString;
	}

	private void HandlePlayerConnected()
	{
	}

	private void HandlePlayerDisconnected()
	{
	}

	private void HandleString(StringMessage message)
	{
	}
}
Properties
Methods
RegisterHandler
Allows for custom network message registration.
UnregisterHandler
Allows for custom network message deregistration.
Disconnect
Disconnects all clients.
Send
Sends a custom message to all connected clients.
Send
Sends a type to all connected clients.
Client.cs
Events
Events that can be bound to through code.
To "bind" to an event through code use "+=" and to "unbind" use "-=".
using UnityEngine;
using Pixelplacement;

public class ClientDemo : MonoBehaviour
{
	private void OnEnable()
	{
		Client.OnConnected += HandleConnected;
		Client.OnDisconnected += HandleDisconnected;
		Client.OnString += HandleString;
	}

	private void OnDisable()
	{
		Client.OnConnected -= HandleConnected;
		Client.OnDisconnected -= HandleDisconnected;
		Client.OnString -= HandleString;
	}

	private void HandleConnected()
	{
	}

	private void HandleDisconnected()
	{
	}

	private void HandleString(StringMessage message)
	{
	}
}
Properties
Methods
RegisterHandler
Allows for custom network message registration.
UnregisterHandler
Allows for custom network message deregistration.
Connect
Connects to a server.
Disconnect
Disconnects all clients.
Send
Sends a custom message to the server.
Send
Sends a type to the server.